Facebook's Split Test Feature: How to Get Started & Best Practices

Editor's Note: This post has been updated with new links and content.
Original Publication Date: August 9, 2019
If your advertising campaigns are going to succeed, one of the most important factors will be testing and comparing different variables. Fortunately, Facebook's in-platform split test feature makes it easy to compare campaigns side by side to find winners.
This feature empowers advertisers to test different components of an ad across devices and browsers. You can use the results of your split tests to increase brand awareness as well as conversions.
Split testing helps marketers make the most of our advertising budgets, which used to be a completely manual endeavor. In other words, if you aren't actively using split tests to improve your ads and campaigns, you're leaving money on the table.
Using Facebook's Split Test Feature
To set up your first split test, you'll need to open your Ads Manager account and create a new campaign.
Next, pick the objective of your campaign. Keep in mind that you can only run a split test for Traffic, App Installs, Lead Generation, and Conversion objectives.
After that, name your campaign and click the Create Split Test tab. Then click Continue.
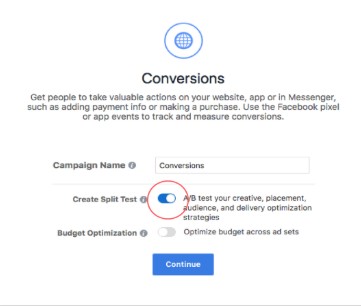
Now select the variable you want to test. Facebook gives you three options to choose from: Delivery Optimization, Audience, and Placement.
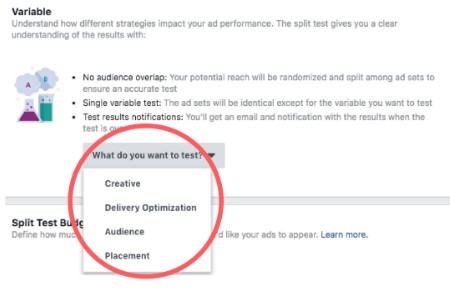
Once you select a variable to test, you will need to decide what you want to test in that variable. Selecting delivery optimization will allow you to test different delivery options and bids.
An Audience split test lets you compare two saved audiences. Running a Placement split test can tell you exactly what placements are performing better for you.
Finalize Your Split Test
Scroll to the Budget and Schedule section to finish creating your split test. Facebook lets you choose how much budget each ad set gets. The default is a 50/50 split but if you click on Even Split, you can change allocate funds how you see best.
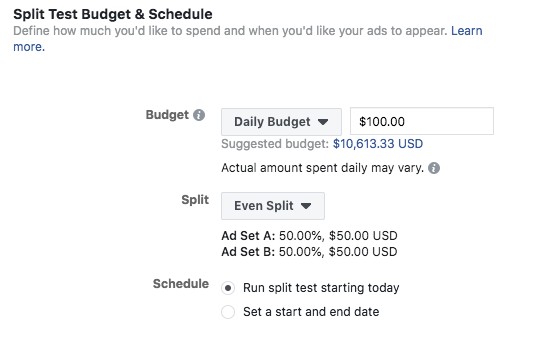
For statistically significant results, you'll have to spend at least $14 and run your test for 3 to 14 days. We recommend a budget that will get you at least 100 clicks in each ad set and running your test for at least 14 days. That will give you the best shot at getting useful data from your test.
Best Practices for Facebook's Split Test Feature
Once you've started using Facebook's split test feature, there are a few things you can do to make your tests more effective beyond budget and scheduling.
First, make sure you're only testing one variable at a time. Your test will produce more conclusive results if the only difference between your two ad sets is the variable you're testing.
Also, make sure you have a reason for your test before you run it. If you think updating the text in your call-to-action will generate more conversions, for example, make that your variable. But don't just test for the sake of testing.
Finally, don't get so caught up in gathering data that you fail to take action when you have useful results. If a campaign shows that one ad is performing better than another, don't wait to see if the latter picks up steam — pause the underperforming ad and move on to the next test.
Guess what? Now you know how to leverage this awesome feature! So get out there and start testing.
Happy Hunting!
Get exclusive digital marketing tips and secrets — click here to join AdLeaks today!


