3 Essential Email Automations to Boost Your Revenue

Are you using email automations for your eCommerce marketing?
No?
Well, were you aware that automated emails generate 3.2x more revenue than non-automated emails?
In other words, without email automations, you’re missing a chance to triple your current revenue levels. (Not great, Bob.)
Now, if you just broke out into a cold sweat, let’s take a step back and a deep breath. When you use an effective email marketing tool like Sendlane, it’s easy to set up automated email flows for your eCommerce brand and get those sales numbers up.
Below, we’ll share three of the most important email automations to boost your revenue, complete with examples and a few bonus tips to supercharge your storefront!
1. Welcome Email Automations
When customers take action, you need to have welcome messages prepared already. Whether they make a purchase, subscribe to your newsletter, or join your email list, you need to make them feel valued and that they made the right choice.
The most effective way to do this, of course, is with an email series.
But your store’s welcome emails should be more than just a warm welcome. Given that roughly 91% of welcome emails get opened, this is your best chance to make a memorable first impression and form a profitable, long-lasting relationship with your audience.
Here’s an example of a welcome email from Felina that offers a 10% discount to buyers on their first purchase:
Building a Welcome Funnel with Sendlane
Manually sending out emails every time a contact joins your list is a huge waste of time, especially if you intend to scale your brand and grow your audience. Instead, just create an automation in Sendlane and let the tool do the heavy lifting for you.
It only takes five simple steps to create your first welcome series automation:
- Click on Automation → New Automation inside your Sendlane dashboard.
- Choose Start From Scratch from the pop-up screen and name your automation.
- Click on +Add Trigger to set a trigger for your welcome series. Choose an option from the drop-down that aligns with your plans for the series.
- Hit the + button and select Send Message from the options on your left. Add your welcome email and customize the content in Sendlane’s email builder.
- When you’re done, click on Active at the top-right of your screen. Congratulations — your welcome series automation is live!
Here’s what your automation workflow should look like:
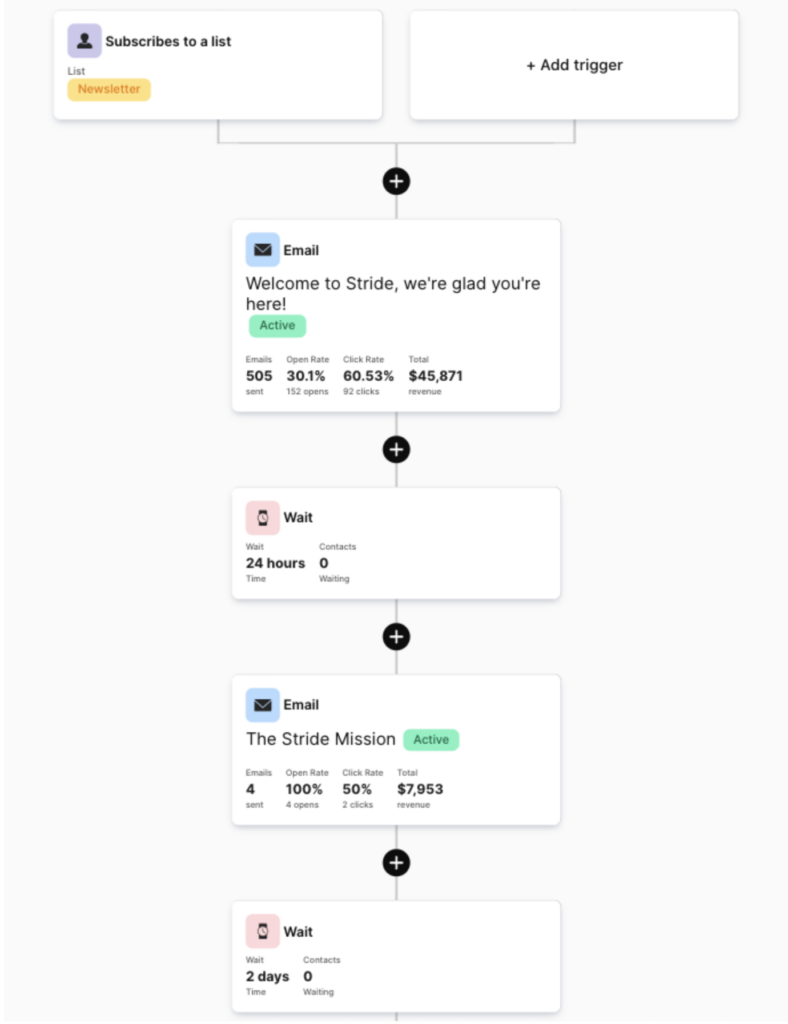
You can add more components to this flow, like another follow-up email, by clicking on the + button at the end of the existing automation.
You can also add custom wait times before triggering the second email.
Again, studies show that a welcome email series can generate 3x more revenue than a single welcome email!
Here’s an example of a welcome email sequence you can create:
- Email 1 (send immediately): Thank your contacts for subscribing and let them know what they can expect from your brand.
- Wait 24 hours
- Email 2: Share your brand’s story or mission statement with testimonials or social proof for support.
- Wait 2 days
- Email 3: Address your value proposition or the problem your product solves. More social proof.
- Wait 2 days
- Email 4: Offer a discount on your subscribers’ first purchase. Incorporate scarcity/urgency to encourage action.
One more guiding principle: effective welcome emails are friendly, concise, and action-driven.
They take subscribers to their next step, which could be anything from learning more about your product to browsing other products in your shop. You might even incentivize sharing a review on your website or following your social media profiles.
2. Abandoned Cart Email Automations
Did you know that about 7 out of 10 online shoppers abandon their carts before finishing their purchase?
That’s why you need abandoned cart emails. An effective abandoned cart email series helps you back these customers and recover lost sales.
Studies have found that abandoned cart email automations bring in 19% more purchases than promotional emails.
And if that’s not enough, sending a second cart abandonment email can drive that number to 54%!
With Sendlane, you can easily connect your online store to your email account and create abandoned cart emails with dynamic content in your automations.
With these systems in place, you don’t even have to think about the content in your cart abandonment emails; the triggers and timings are all pre-set too.
Here’s an example of an abandoned cart email from Alex Mill that offers 15% off to bring potential buyers back:
Building Abandoned Cart Email Automations in Sendlane
To create an abandoned cart email workflow, you’ll need to integrate your online store with Sendlane first.
After that, just follow these steps:
- Click on Automation → New Automation inside your Sendlane dashboard.
- Choose Start From Scratch from the pop-up box and name your automation.
- Click on + Add Trigger to choose a trigger for your abandoned cart series.
- Click the Shopify tab on your left.
- Select Customer Abandoned Checkout to configure your trigger.
- Edit your store name, limit per contact, and the time Sendlane should take to consider the cart as abandoned.
- Hit the + button to add an action, and select Send Message from the options on your left to create your cart abandonment email.
Here’s how the automation will look within Sendlane:
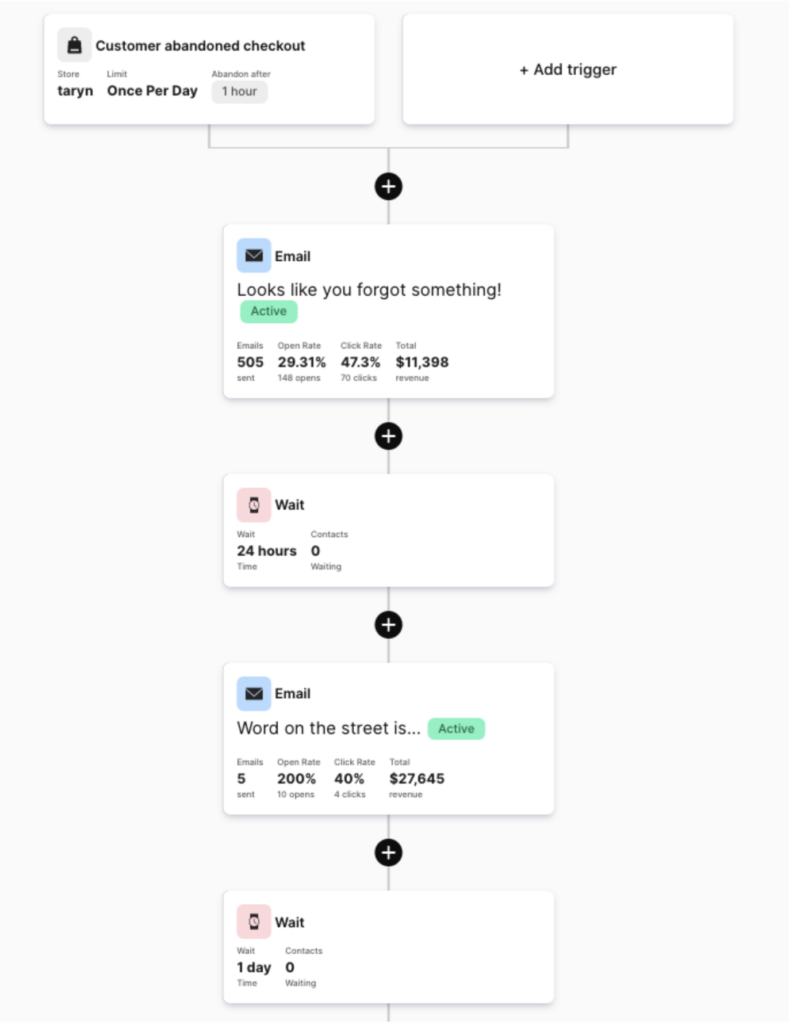
To add even more layers to this automation, click on the + button at the end of the automation.
Here’s an outline of a cart abandonment email sequence you can start with:
- Wait 4 hours (max)
- Email 1: Remind shoppers about the products in their cart. Include product images and scarcity in copy.
- Wait 24 hours
- Email 2: Share information and testimonials (aka social proof) about the abandoned product. Include product images and urgency in copy.
- Wait 1 day
- Email 3: Share value proposition and include a discount coupon or free shipping.
- Wait 2 days
- Email 4: Remind shoppers about their expiring discount.
- Move prospects to a new automation.
Because cart abandoners are shoppers who have shown interest in your offer, you can try to win them back by sending reminders and creating urgency.
Adding a countdown timer, for example, can show that the cart is about to expire soon. You can also share the number of items left in stock if your supplies are limited.
Finally, incentives like discounts and free shipping can increase your chances of making a sale if the shopper isn’t responding to your content.
3. Customer Retargeting Automations
This might come as a shock, but your website isn’t the only place your contacts spend time online.
They’re also on Instagram, Facebook, Snapchat, Twitter, and TikTok. And when they aren’t checking those feeds, they’re checking their email.
If you aren’t active on these platforms, it’ll be hard to stay top-of-mind when shoppers leave your store.
But retargeting helps with that. You can reach your audience on Facebook and other channels beyond your website.
And you don’t even have to take our word for it — research has found that retail shoppers are 70% more likely to convert after seeing a retargeted display ad!
Here’s an example of a retargeting ad from Barner on Facebook. Users who click are directed to the relevant product page:
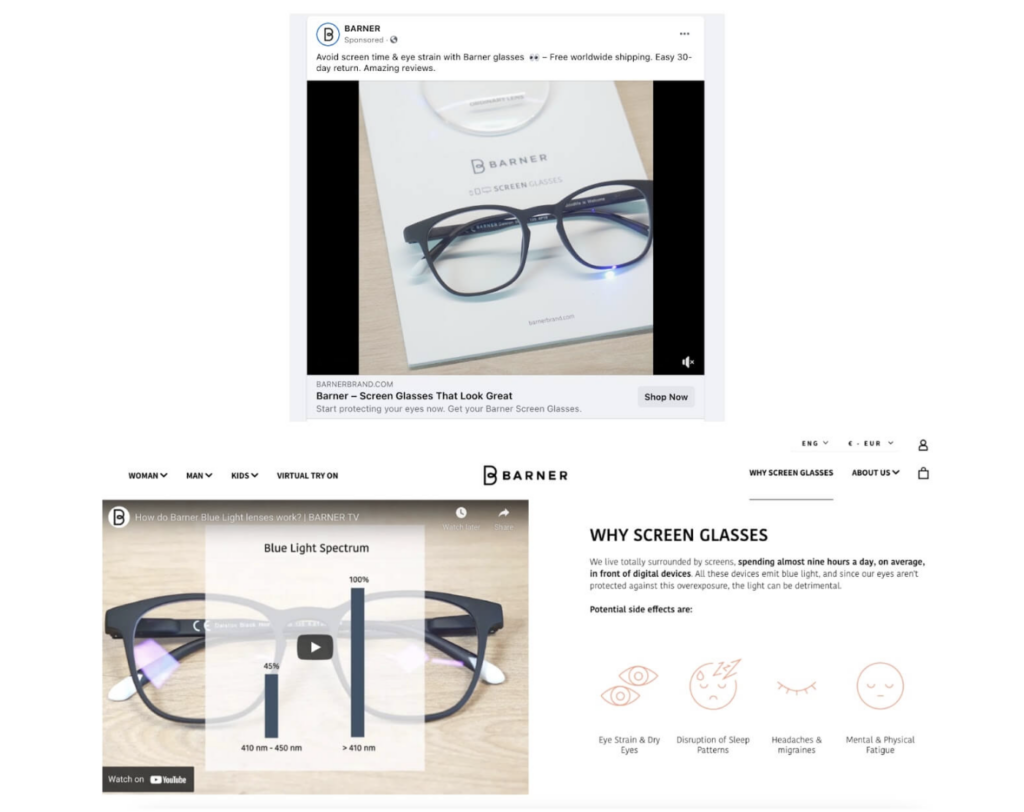
Click here if you’d like to learn more about retargeting your email audience on Facebook.
Building Customer Retargeting Funnels in Sendlane
It’s easy to set up multi-channel retargeting funnels in Sendlane so you can reach website visitors on Facebook and via email.
Before you get started, however, you’ll need to add Sendlane Beacon to your website to track user activity. The Sendlane system uses the data that the Beacon collects to define your retargeting audiences.
After that, follow these steps to create the automation:
- Click on Automation → New Automation in your Sendlane dashboard, and click Start from Scratch. Name your automation.
- You can also use Sendlane’s pre-built retargeting funnel template for this automation by clicking on Cross Channel & Retargeting.
- Pick a trigger for your retargeting funnel by clicking on + Add Trigger.
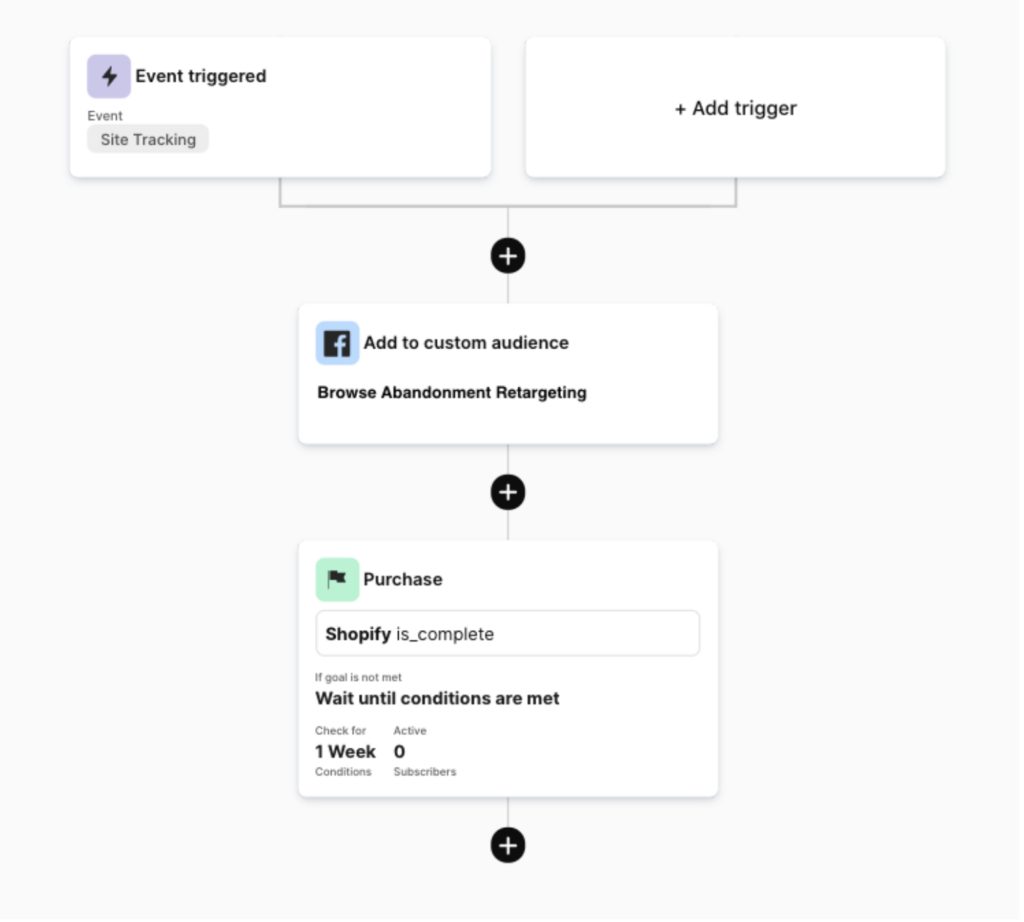
- Click Event Triggered and select Site Tracking as the event. Enter the URL of the page where you’ve enabled Sendlane Beacon.
- Click on + to add an action. Open the Facebook tab and select Add to Custom Audience.
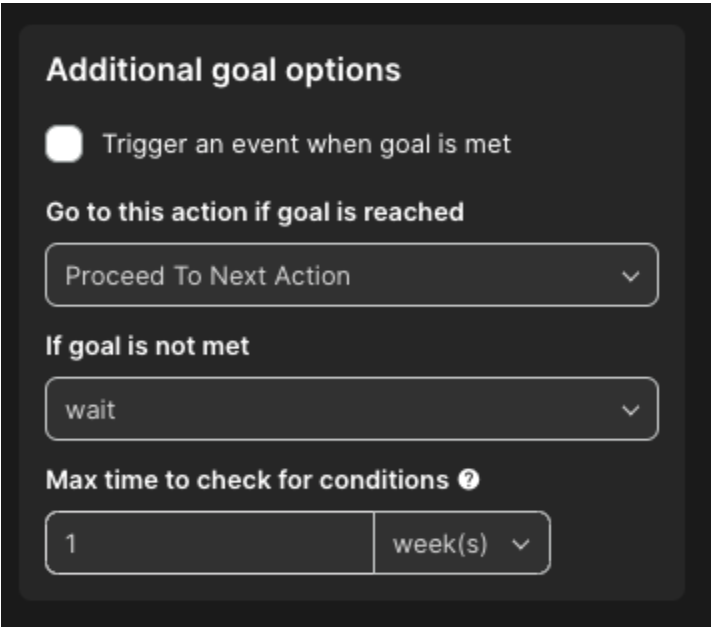
- Click on + to add another action—select Goal to choose a goal for your retargeting funnel. If you want the automation to stop when a contact opens a campaign or makes a purchase, you can set those parameters here.
- Add one more action to Remove From Custom Audience once the goal is reached. This will prevent your contact from seeing your retargeting ads on their Facebook feed — and save you money on ad spend.
Your customer retargeting funnel should look something like this:
Retargeting is another effective way to bring picky shoppers and cart abandoners back to your store for purchase.
When you run your ads, always link them to relevant landing pages that give shoppers what they were promised.
Also, use consistent components like brand colors, product images, and copy to leverage your shoppers’ familiarity with what they’ve seen on your site.
Capture More eCommerce Revenue with Sendlane Email Automations
Automation is a must-have if you want to take your email marketing to the next level. You can turn your one-off email campaigns into a series of great emails that exponentially increase your chances of making sales.
It’s easy to create effective automated funnels in Sendlane that will help you multiply your eCommerce revenue!
Sign up for Sendlane’s 14-day free trial to create your first email & SMS automation today!


