Connecting a Messenger Chatbot to Your Ads

Editor's Note: This post has been updated with new links and content.
Original Publication Date: September 11, 2017
In previous articles, we've covered how you can use a Messenger chatbot to:
- Generate leads using a lead magnet
- Send cart abandonment reminders
- Integrate user data with your CRM
All those strategies are useless, however, if you don’t have any bot users!
8 Steps to Connect a Messenger Chatbot to Your Ad Campaign
In this tutorial, we’ll be connecting a Messenger chatbot to an ad campaign to drive traffic. We’ll also recommend the best objectives for your budget.
Step #1: Build Your Messenger Chatbot Funnel
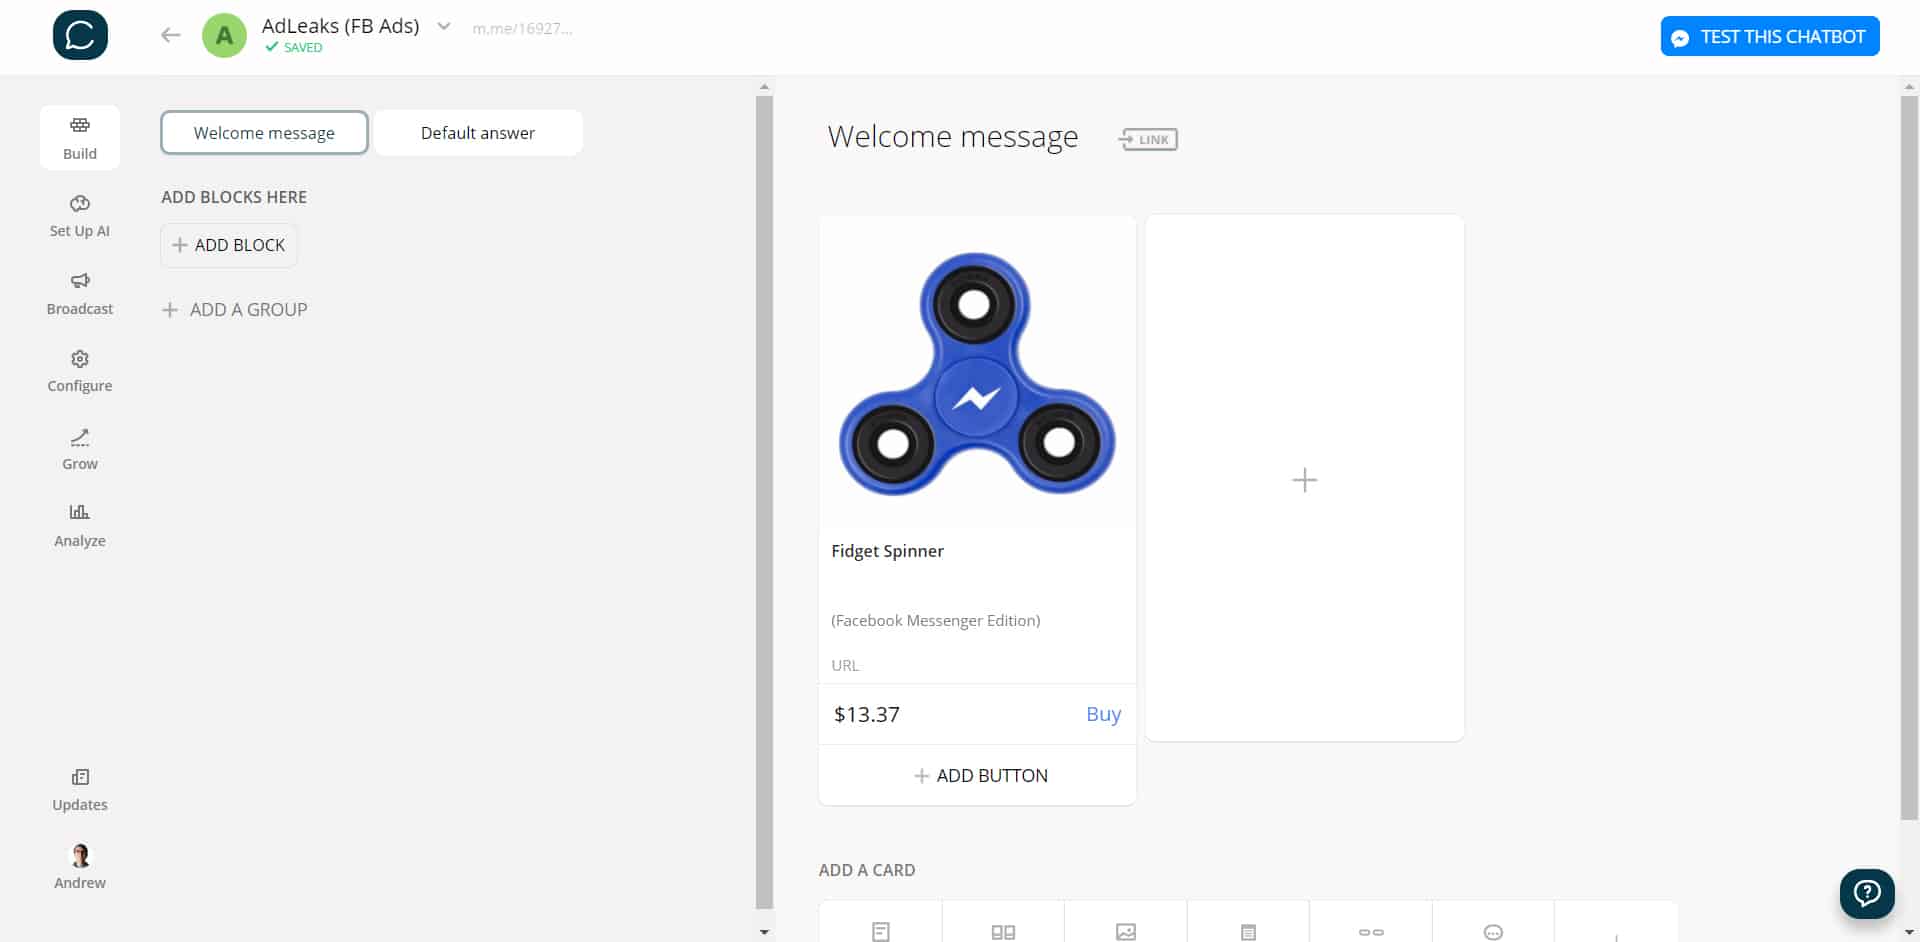
Using Chatfuel, design the bot funnel for your campaign.
We’ll keep things super simple and include a product with a native ‘Buy’ button in Messenger.
Step #2: Choose Your Objective
We prefer using the ‘Traffic’ objective. (But before Facebook optimized the Traffic objective to include Messenger chatbot campaigns, we would’ve advised against it…)
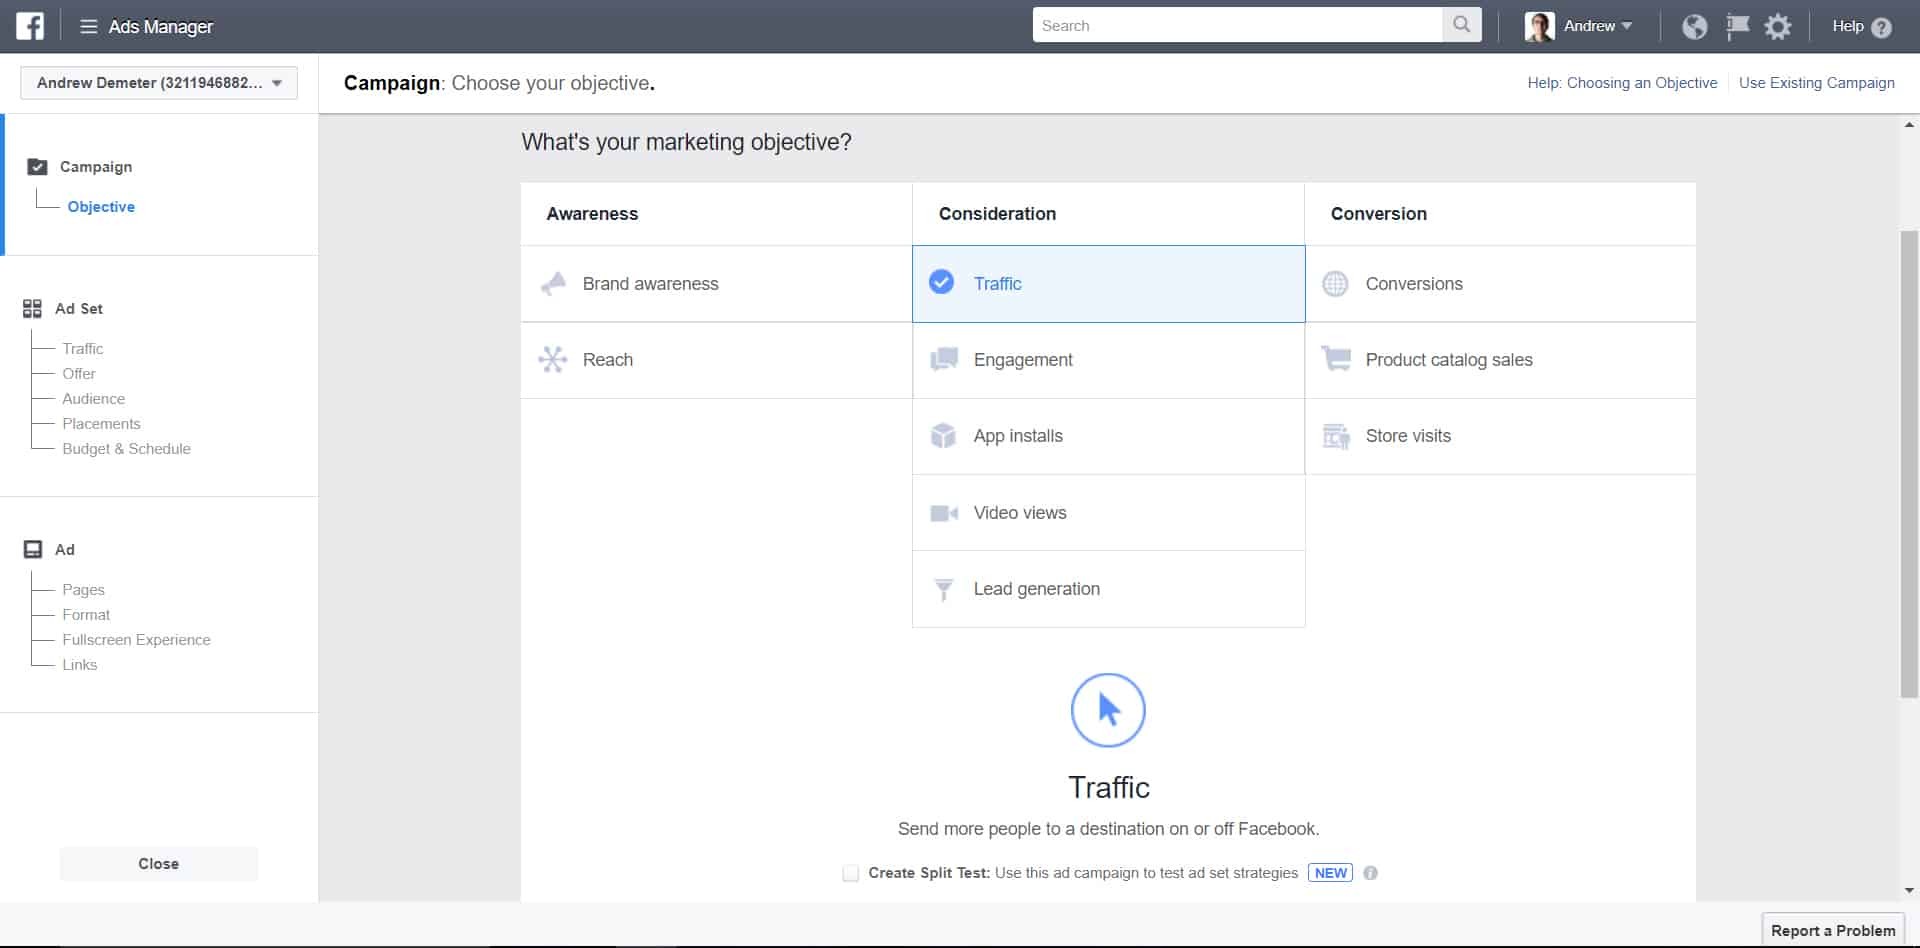
Today, Facebook will reward you with a lower Cost-Per-Action (receiving a new message).
That’s because you’re keeping users on their platform, not redirecting them to your own landing page where Facebook loses advertising opportunities.
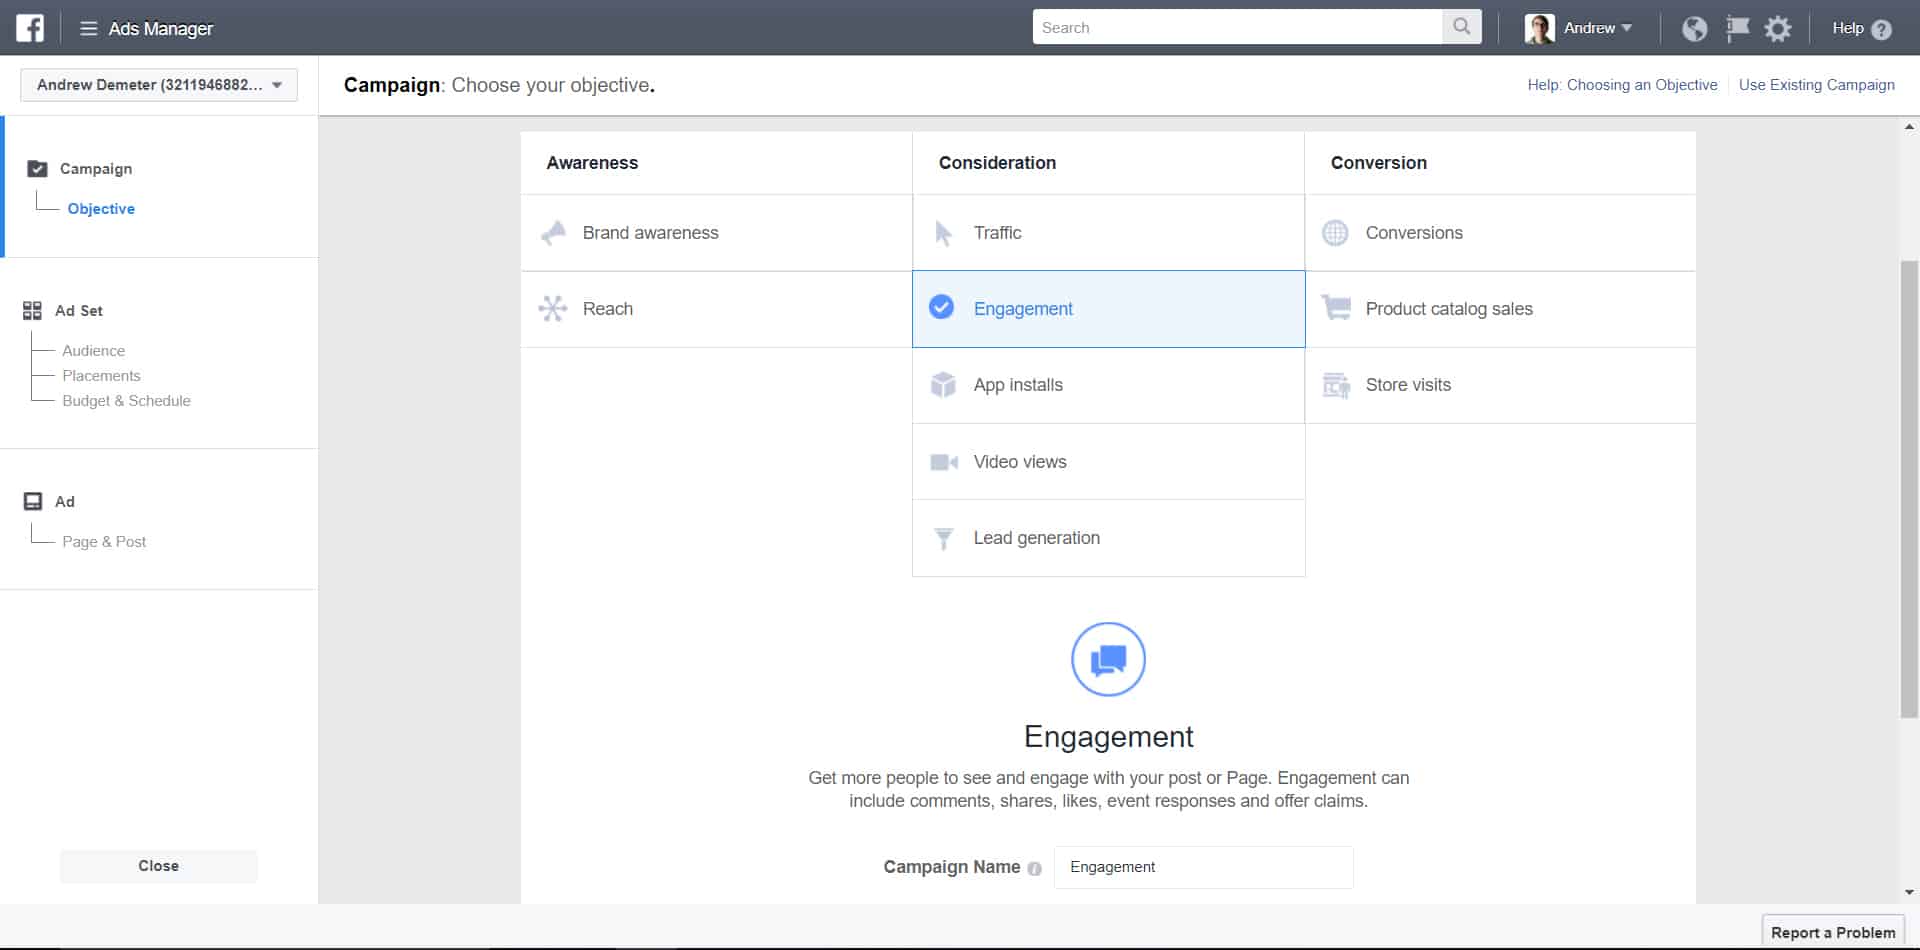
The ‘Engagement’ objective is also fun, but more on that later.
Step #3: Edit Ad Placements
Next, we'll remove unsupported placements for our Messenger destination ad.
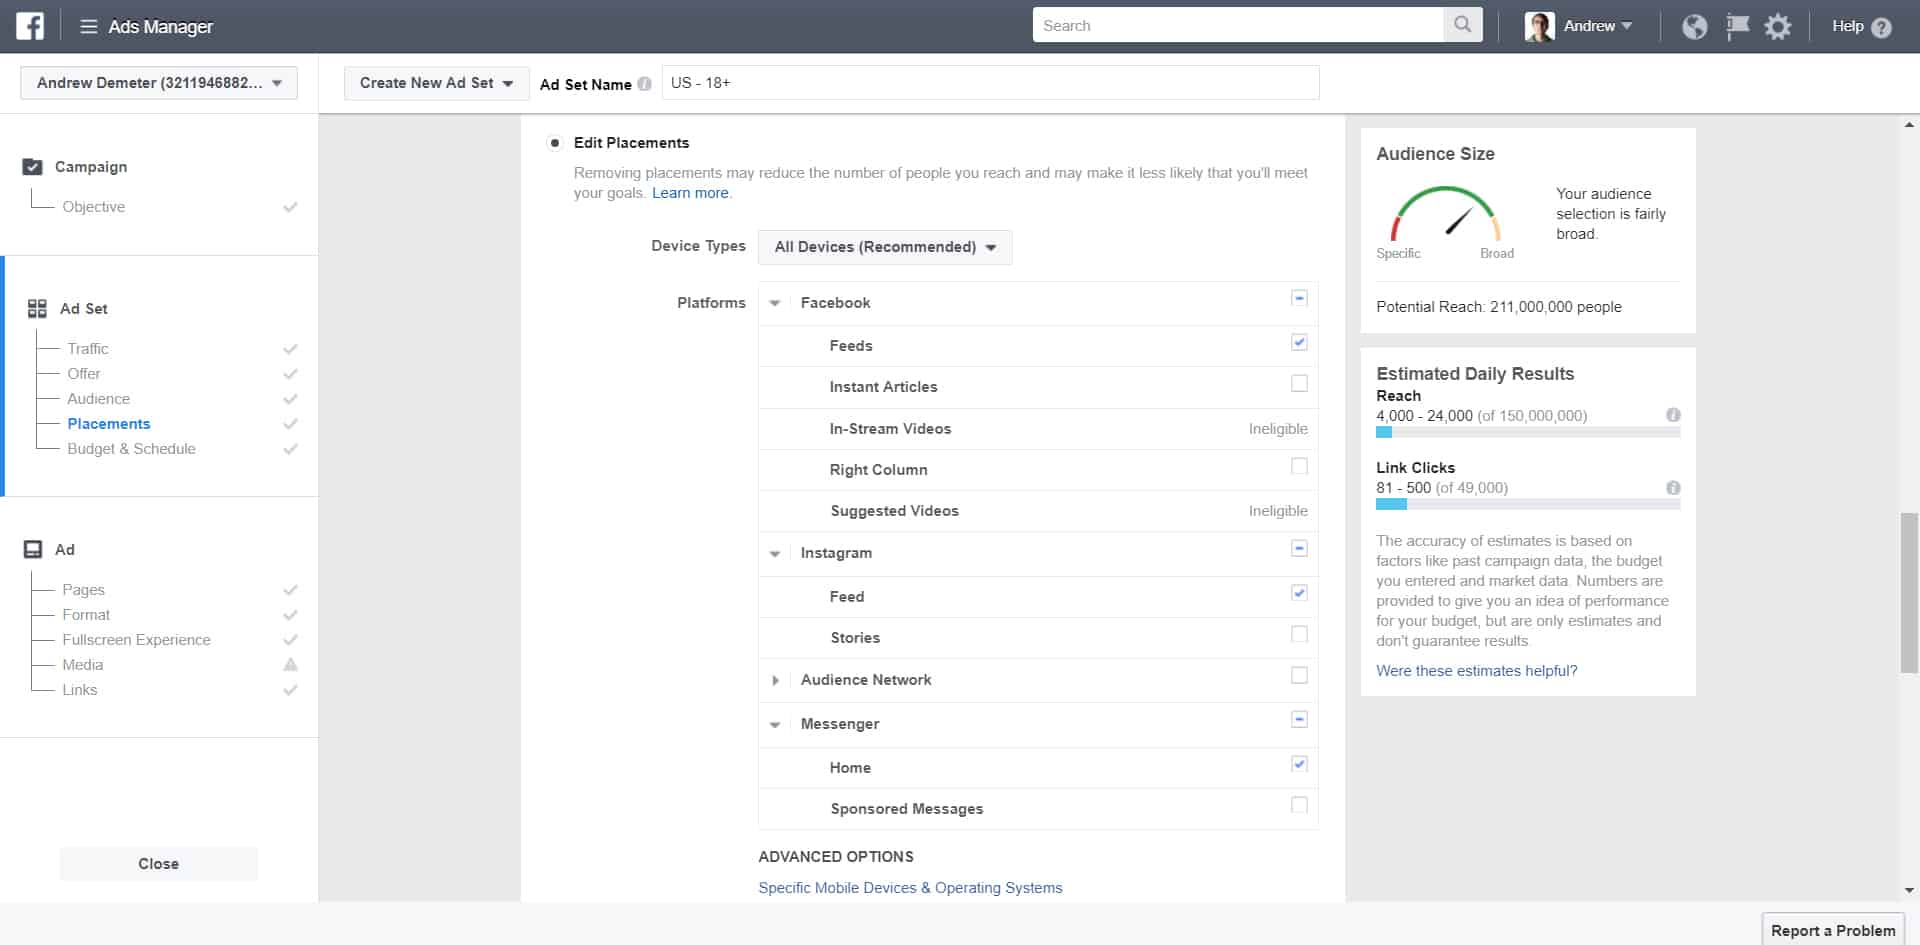
Although Instagram is a supported placement, we suggest unchecking it because it complicates user experience. People scrolling through their Instagram feed don’t want to be redirected to Messenger.
Ironically, though, we also advise against the Messenger placement. This means your ad will appear in Facebook users’ Messenger conversations (not their news feeds).
But, as always, A/B test everything for yourself; don’t take our word for it!
Step #4: Switch to Cost-Per-Click
Under BUDGET & SCHEDULE, switch from ‘Impression’ to ‘Link Click (CPC)’.
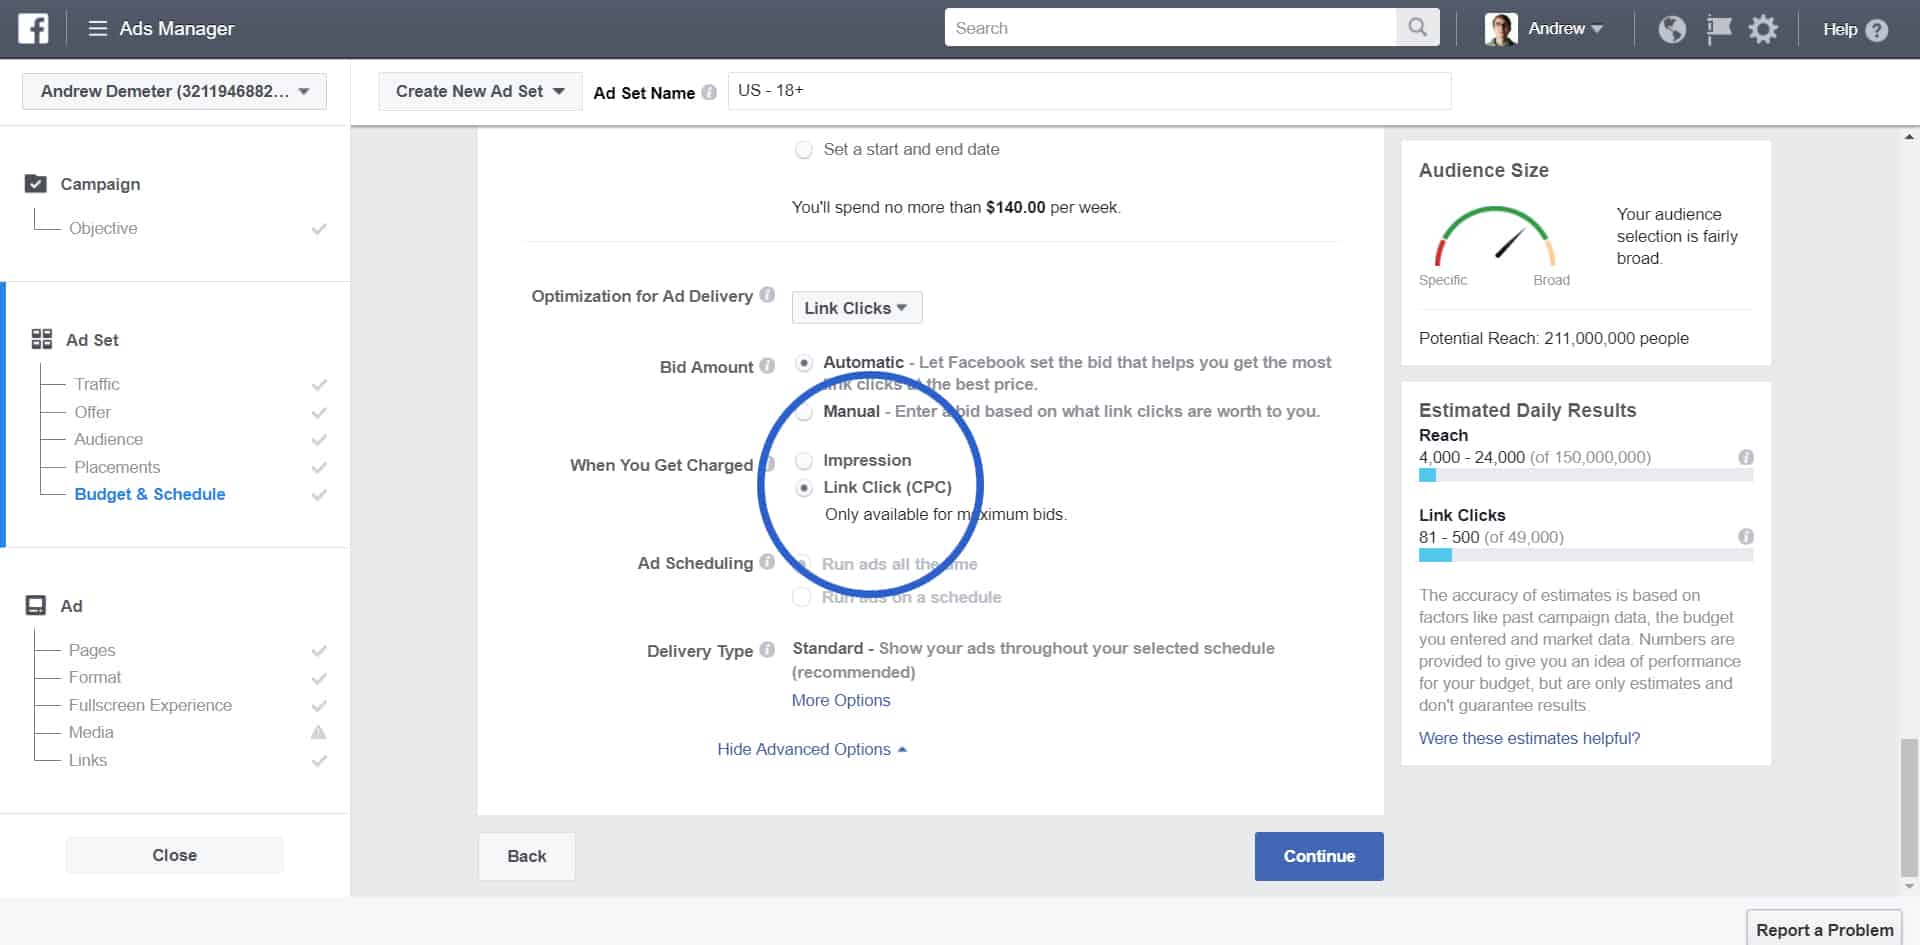
Now, instead of getting charged every time someone sees the ad, you’ll only get charged when a user interacts with the Messenger chatbot.
Step #5: Connect Your Page
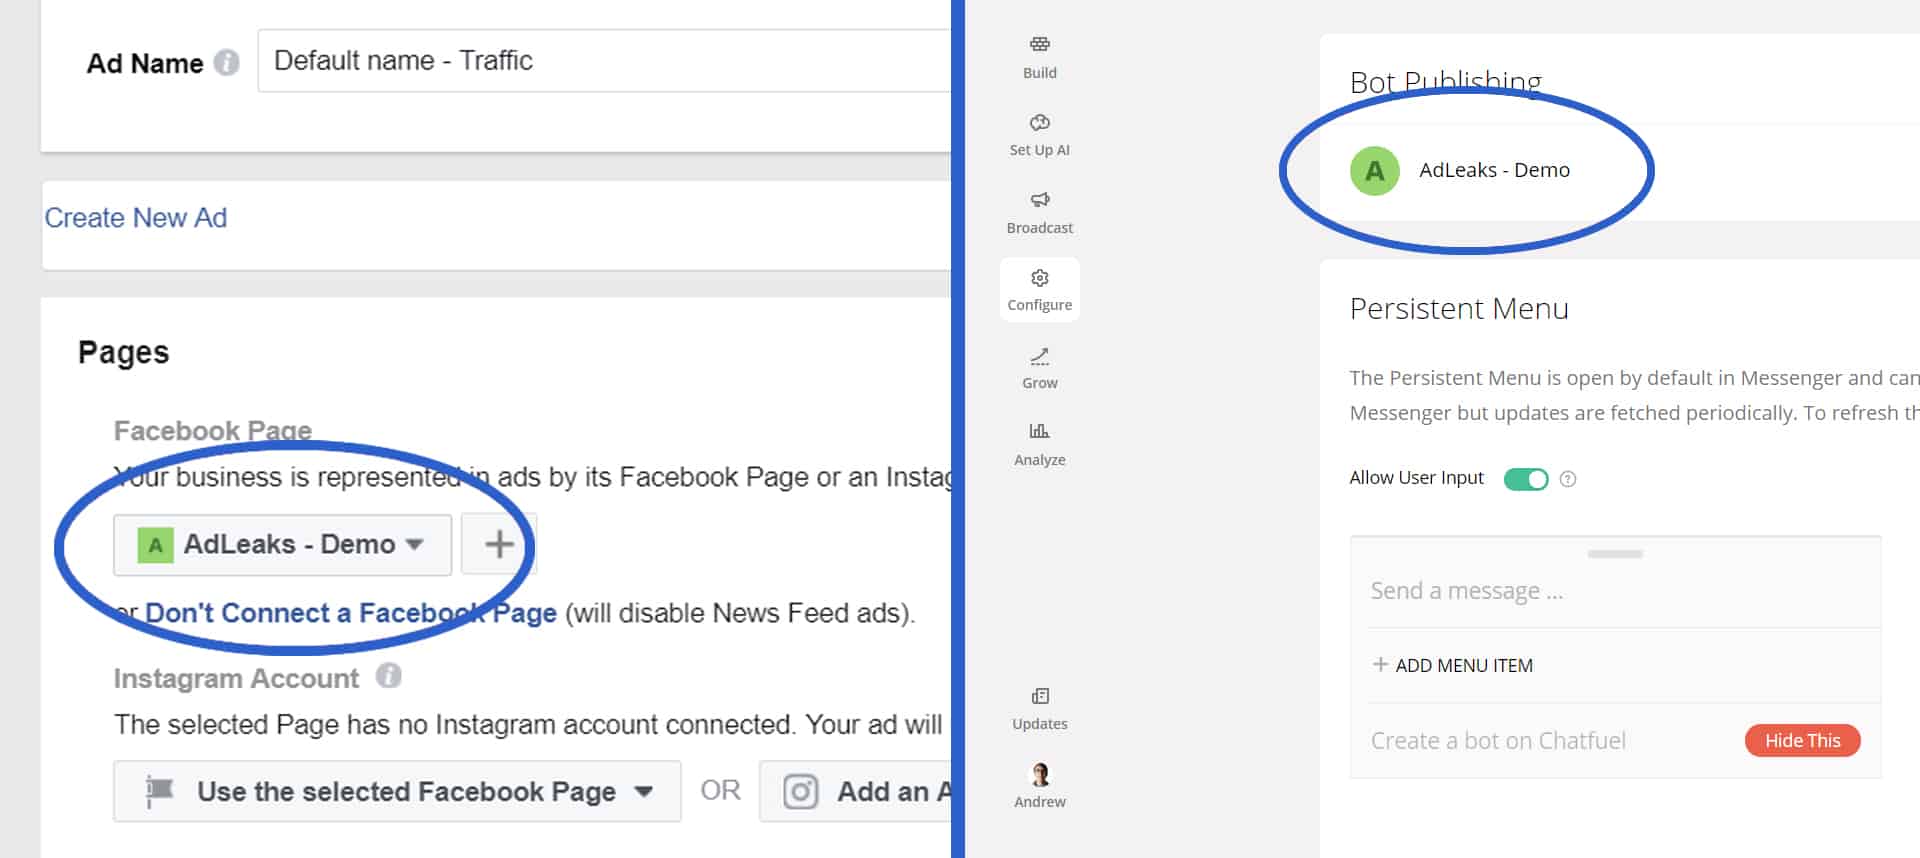
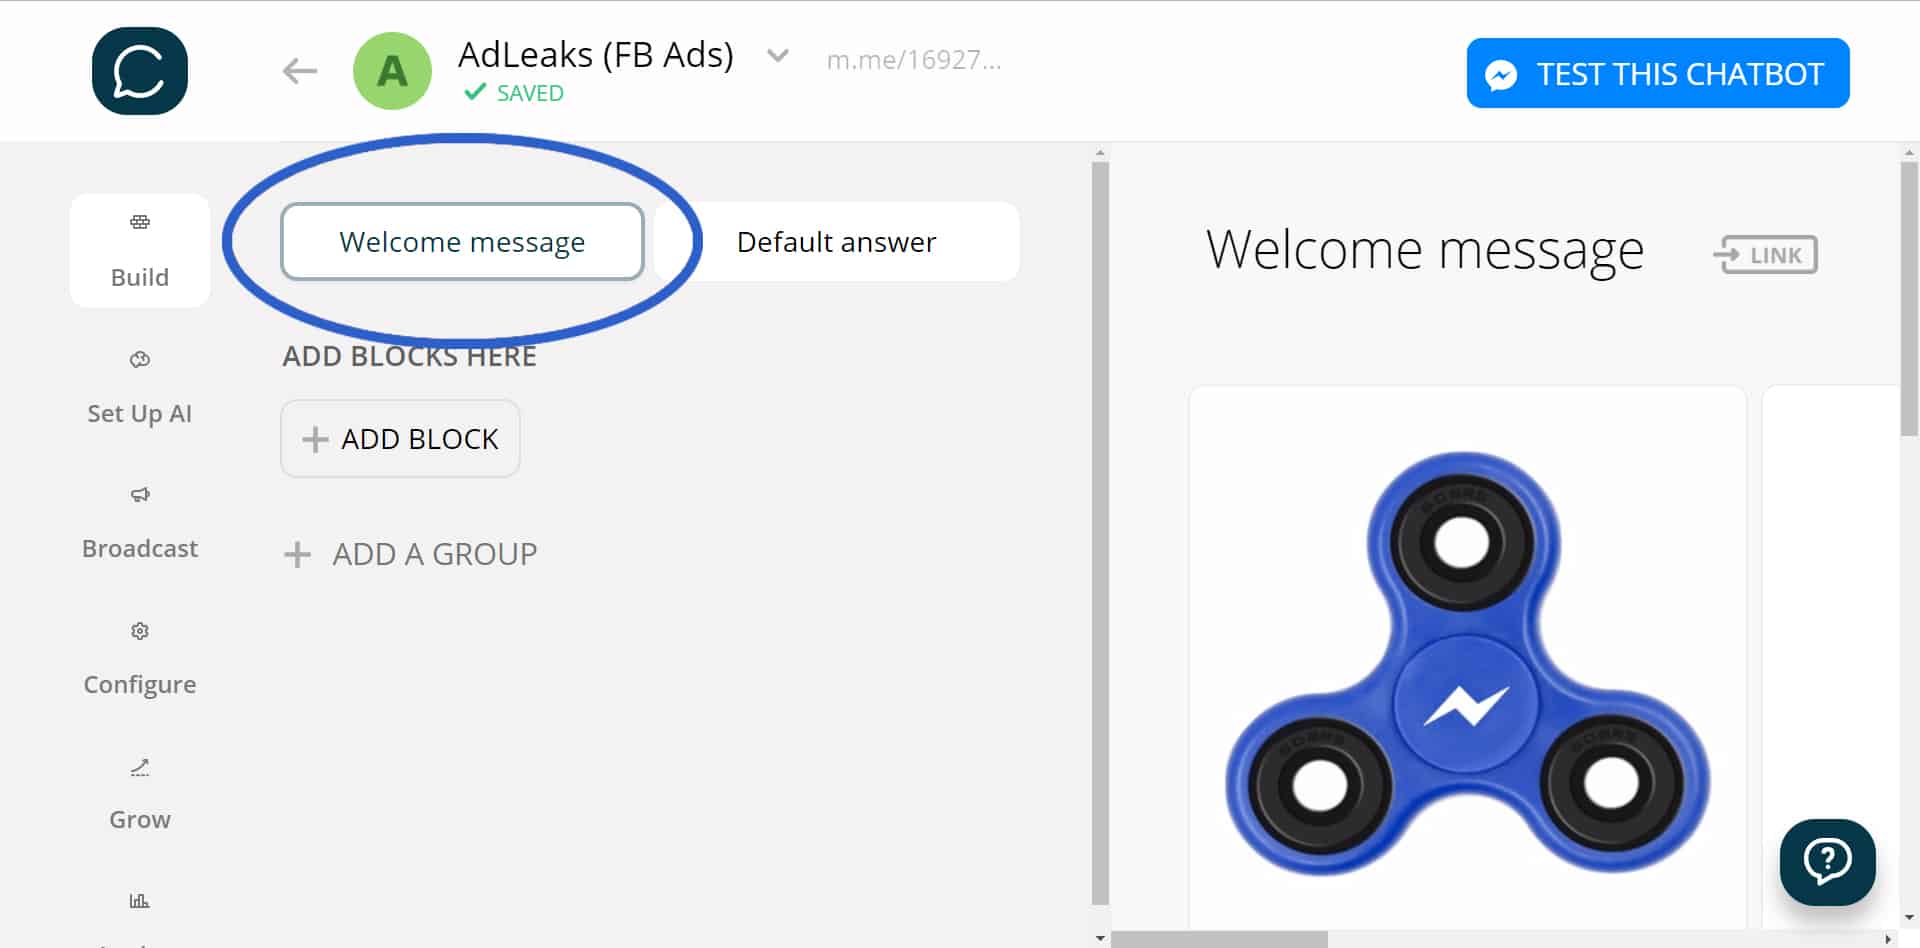
Confirm the Facebook page you’ve selected to run the ad matches the page your bot is connected to. You'll find this under the CONFIGURE tab in Chatfuel.
Step #6: Design Your Creative
Hopefully your creative is better than ours…
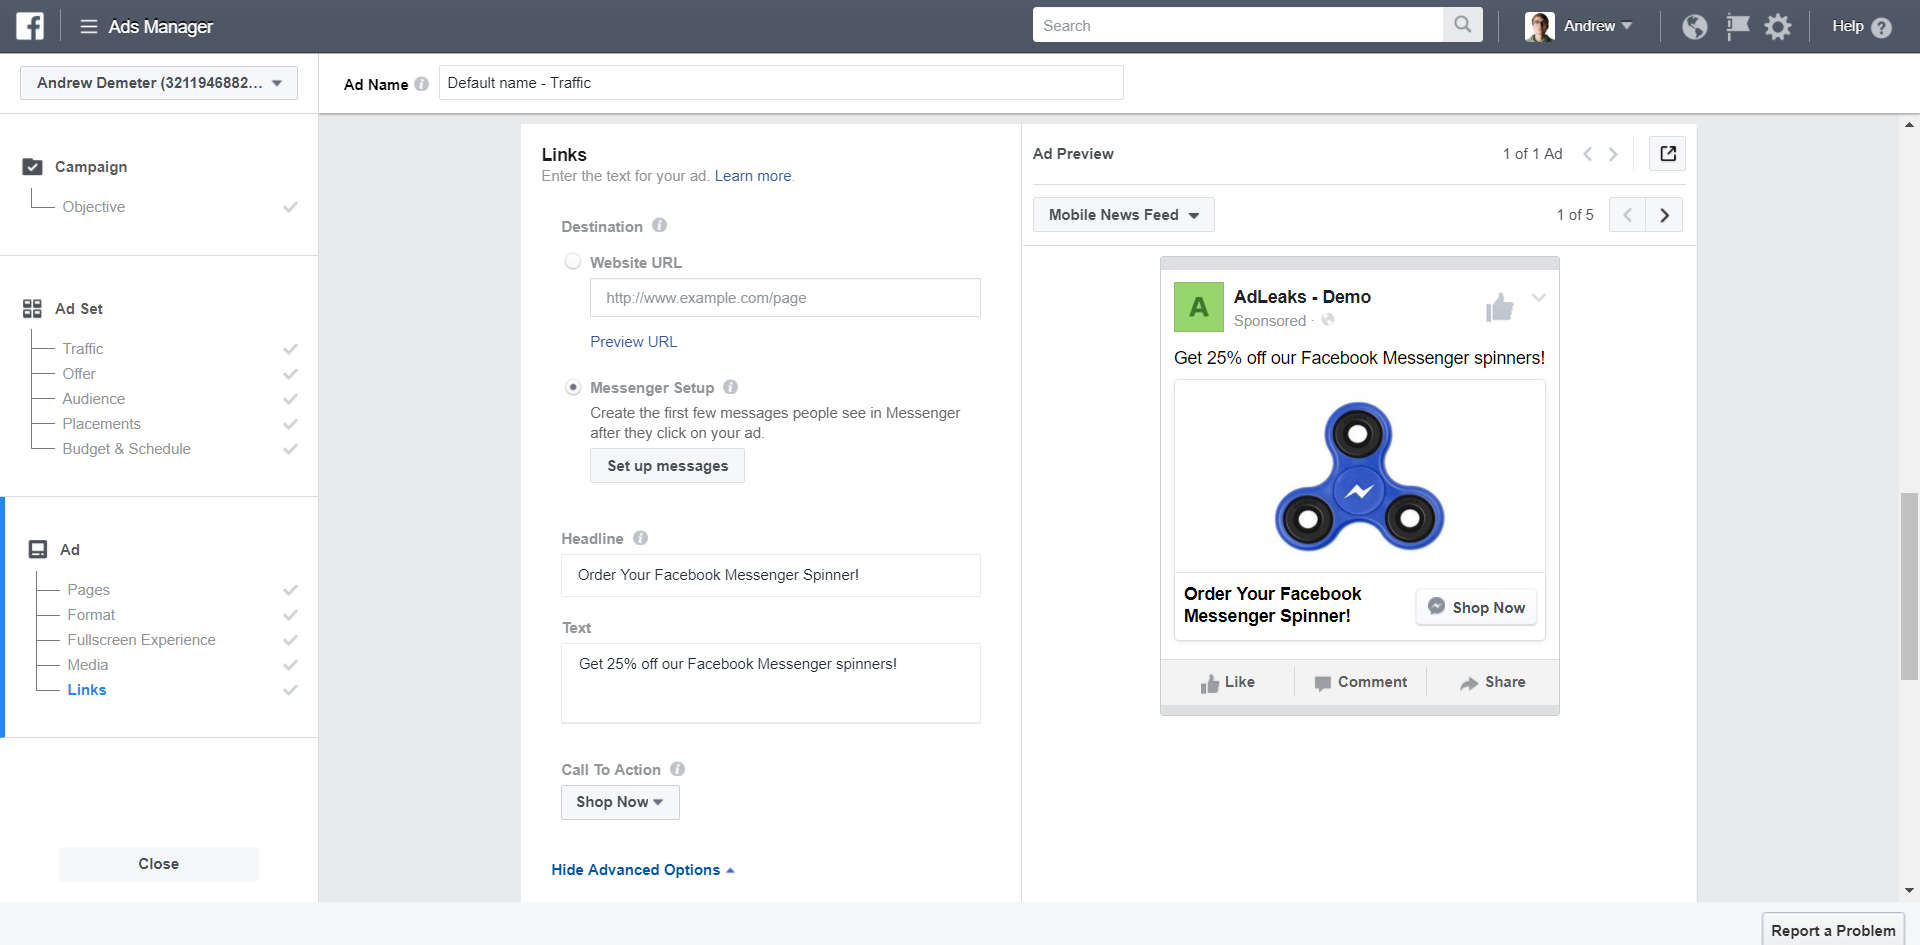
Then choose ‘Messenger Setup’ and click ‘Set Up Messages’.
Step #7: Connect Your Bot’s Welcome Message
Now we’re setting up what users who click the CTA button on your ad will see before they can interact with your Messenger chatbot. Facebook uses this technique as a double opt-in.
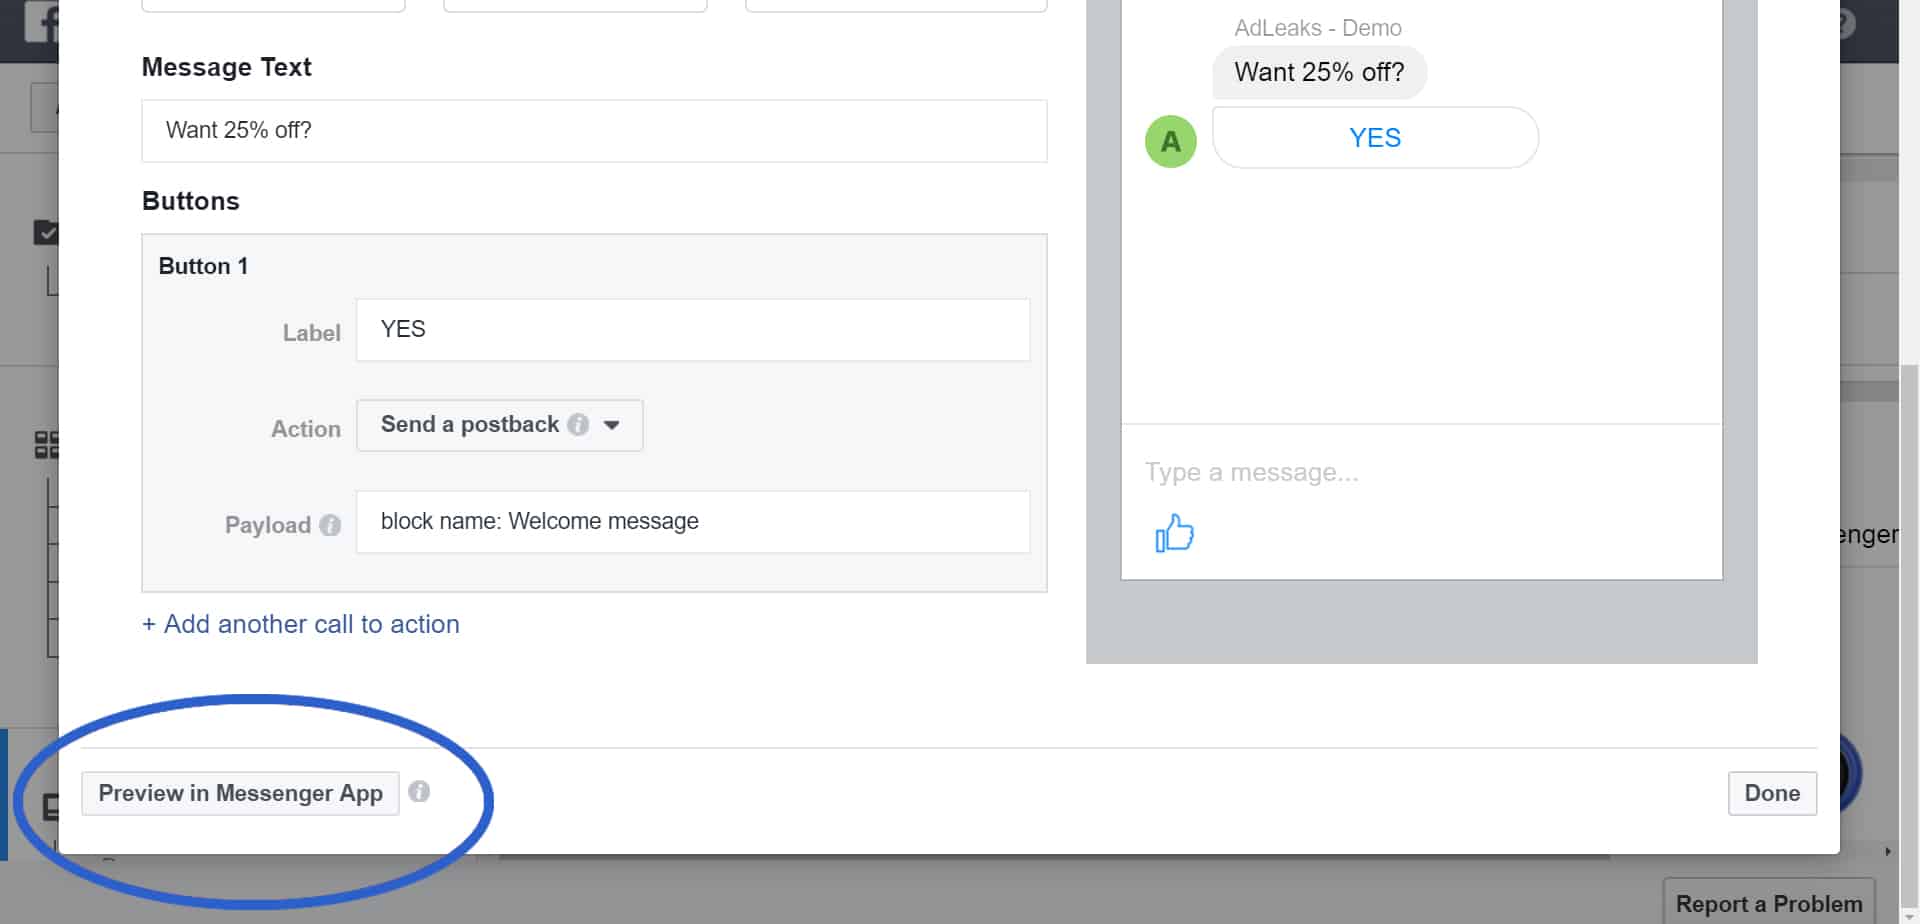
We use TEXT for the ‘Message Format’ because it offers a very clean call-to-action button.
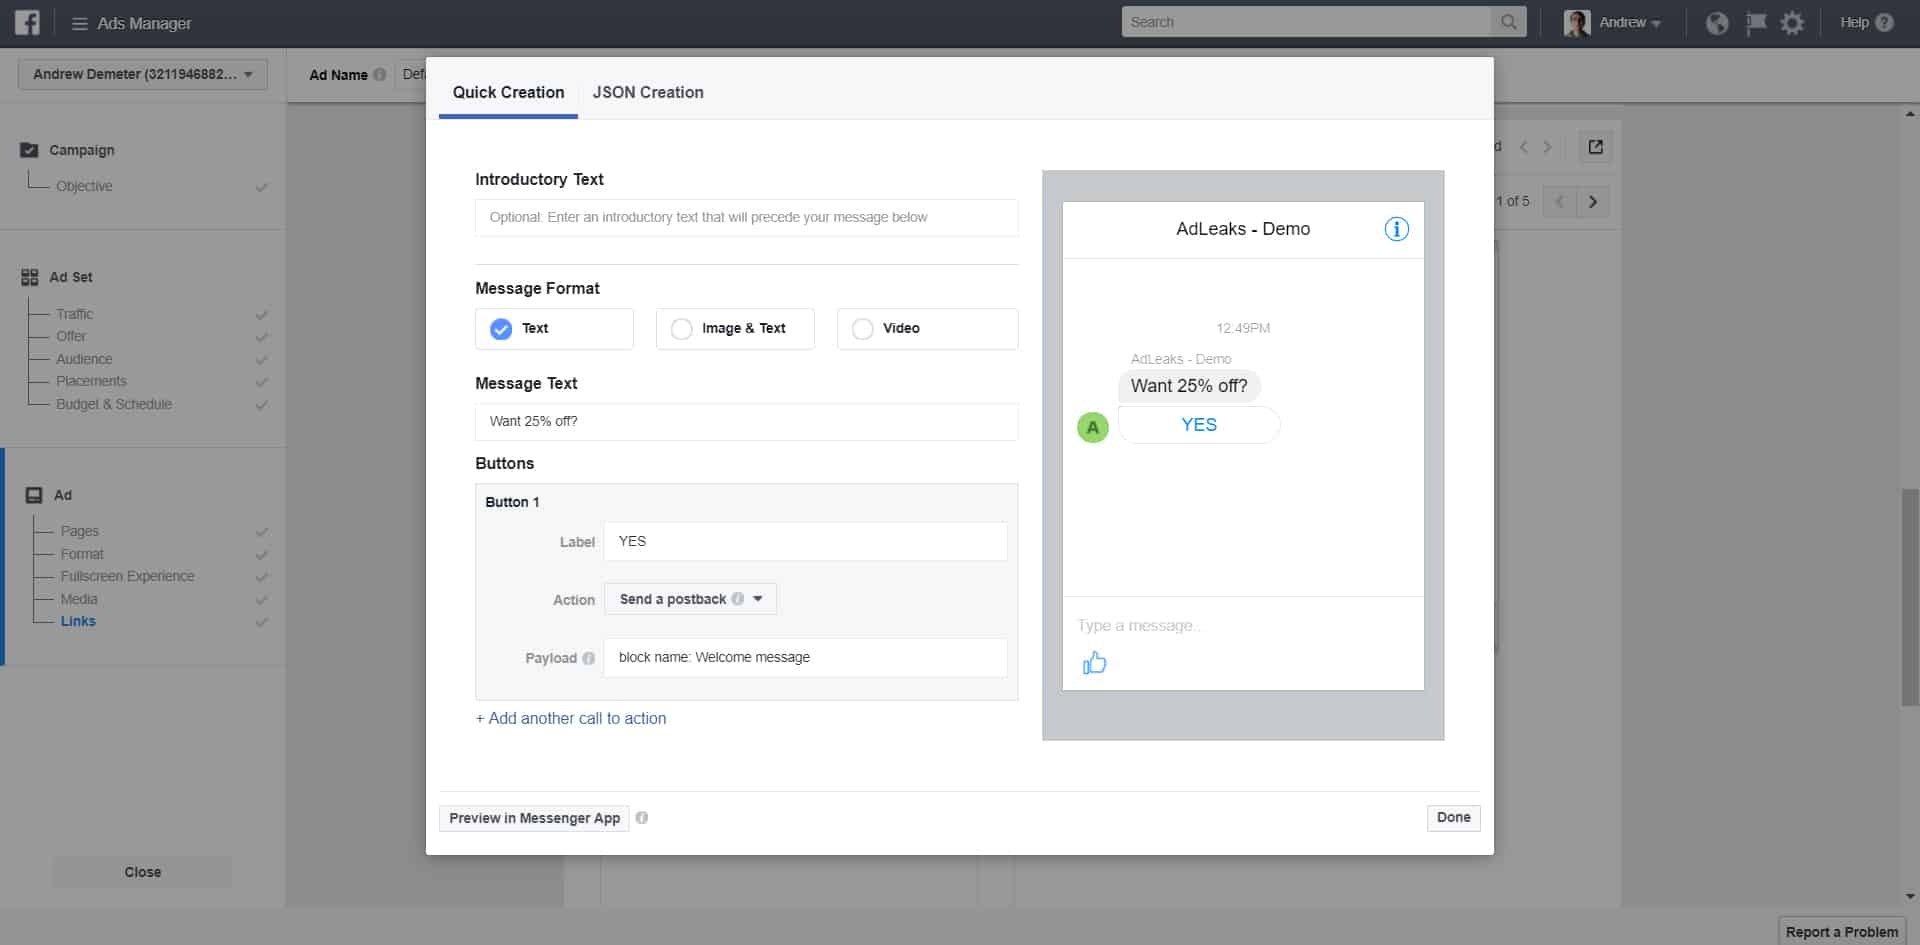
Then change the ACTION from ‘Open a website’ to ‘Send a postback,’ and enter…
block name: <block name in Chatufel>
(NOTE: The postback code is case-sensitive!)
Step #8: Preview in Messenger
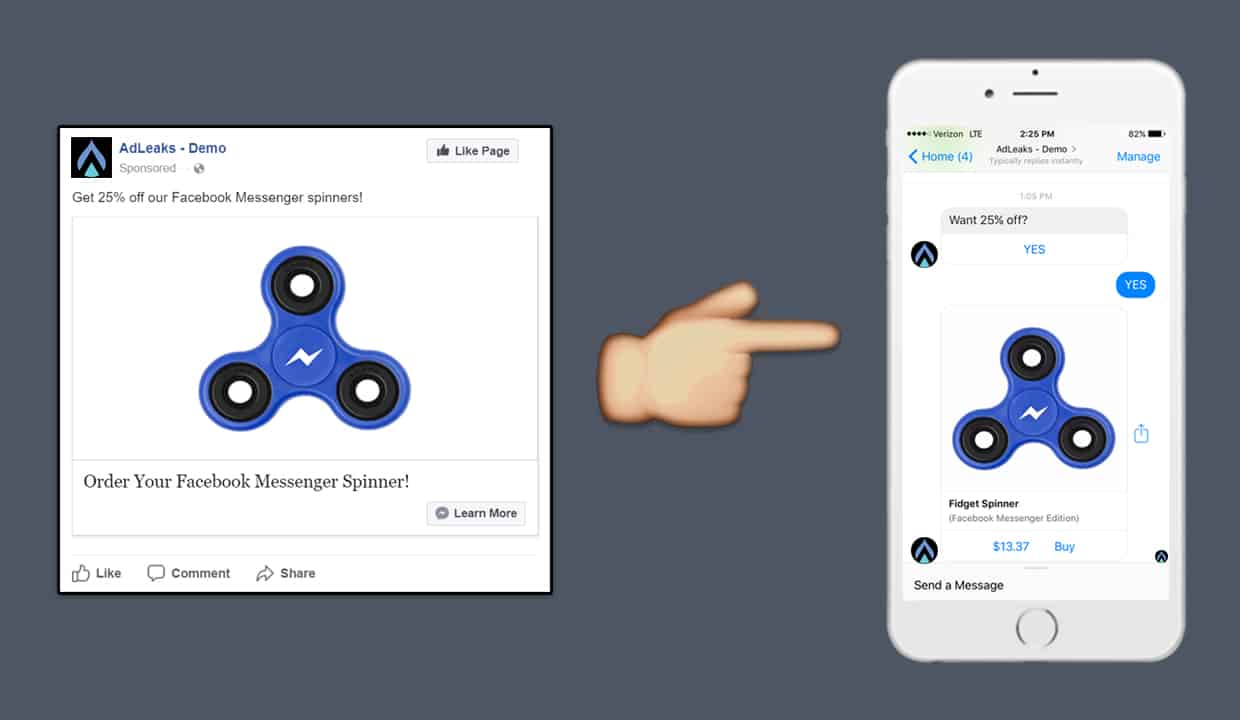
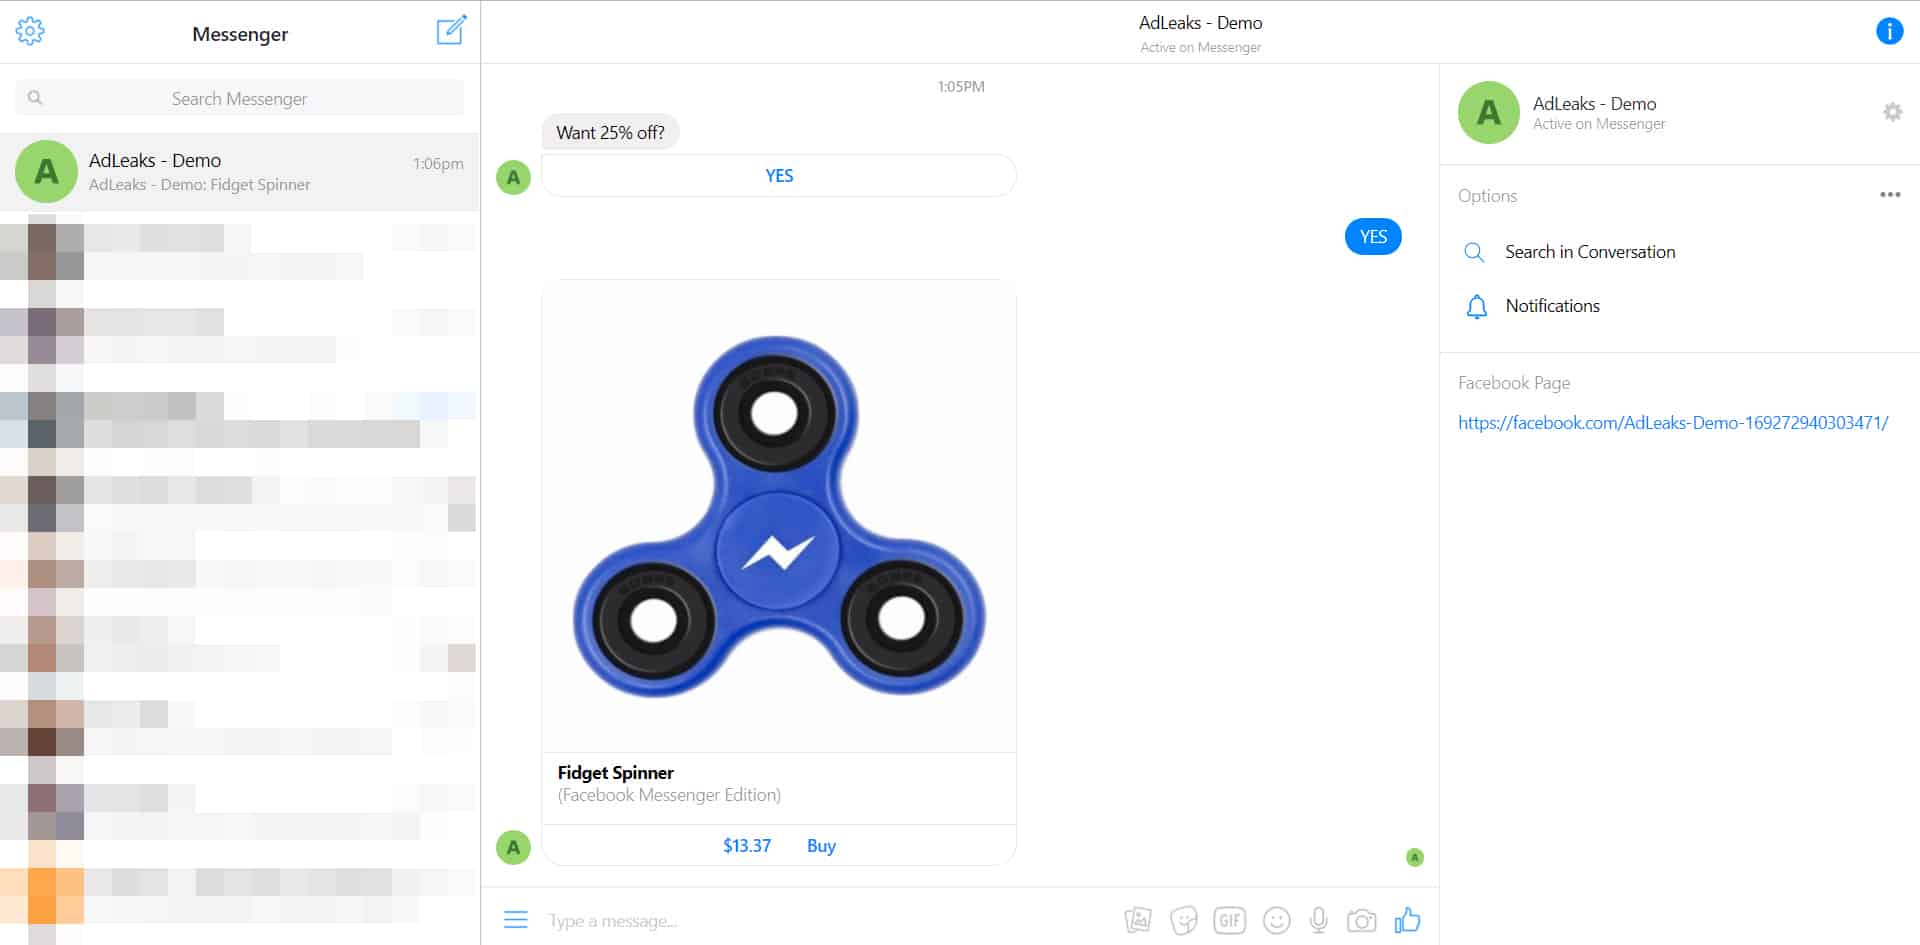
Let’s test our Messenger chatbot! Click ‘Preview in Messenger App’.
The bot messages us, we click YES, and voilà – we see our prized Messenger fidget spinner!
Finally, submit your Facebook ad for review.
Final Thoughts on Your Messenger Chatbot
It goes without saying that Facebook Ads are the best way to gain new bot subscribers.
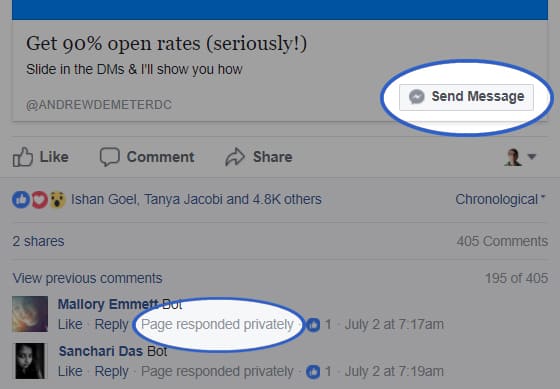
In closing, here’s a bonus ninja tip for you: Duplicate the Post ID of the Traffic ad you just submitted, but run it as an Engagement objective after setting up ‘acquire new users from comments’ in Chatfuel.
Now you’ll have a single Facebook ad with two opportunities for users to trigger the CTA. They can either click the 'Send Message' button OR leave a comment and the bot will message them with the discount code.
Looking for more exclusive digital marketing tips and secrets? Click here to Join AdLeaks today!


