Back to Basics: Facebook's Attribution Window


Facebook's reporting can be puzzling sometimes especially when you try to track where your conversions or sales are coming from. So for this post, we will talk about how the attribution window works.
What is the Attribution Window
The attribution window is the number of days between when a person viewed or clicked your ad and then subsequently took an action as defined by Facebook. To further help us understand, Facebook reports ad actions based on the views and clicks on your ads. They call these actions, click-through attribution, and view-through attribution.
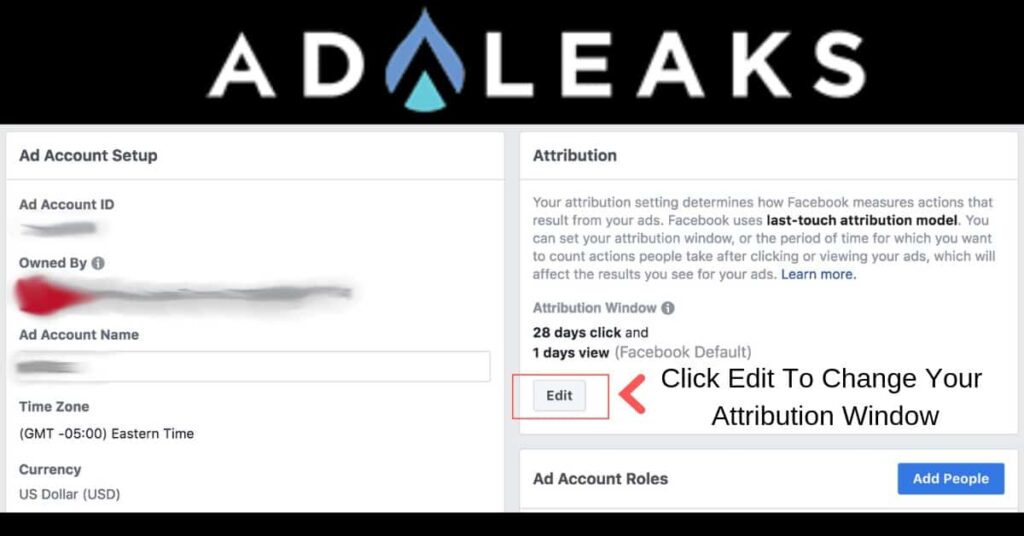
Facebook's default window is 28 days click and 1-day view. This means you see actions that happened 1 day after someone viewed your ad and up to 28 days after someone clicked your ad.
Example
Let's say someone saw your ad on September 1st. They clicked on it and reached your site but didn't purchase until September 5th. The purchase record will be credited or will be shown on September 1st, instead of September 5th.
Based on the example mentioned above, there can be some confusion with the data on your dashboard. You might have a sale on that certain day, but when you check the data for that day it may not show the purchase. One thing you can check is your attribution window!

How to Check Your Attribution Window
- Navigate to "Settings" from the main menu of your ads manager
- You will then see your Attribution window. Click "Edit" under "Attribution" (on the far right side)
- Select your preferred click and view window
- Click "Saves Changes"

Note when you change your attribution window, your default conversion window for future ads will be as closely aligned as possible to your selected attribution window. You can manually change your conversion window if you don't want to use the default option.
One Step Further
You can also add comparing windows to show view and click attribution on your ads manager dashboard. To do this, simply:
- Go to Ads Manager.
- Click Campaigns, Ad Sets or Ads depending on what you want to update.
- Click the Columns drop-down menu.
- Select Customize Columns from the drop-down menu.
- Click Comparing Windows and select your lookback period.
ProTip: You can also select "Include default attribution window" and compare your lookback period to the default period.
You can take advantage of the attribution window to make better reports for your clients. This also is important if you have a revenue-sharing agreement with any of your clients.
Thanks for reading our blog. We appreciate everyone in the AdLeaks community.
Have a great day and Happy Hunting 🙂
Shout Out to our man Dee Deng for coming up with the idea for this article. If you haven't checked out our premium group you are missing out!
Already a Premium Member? Click Here to Watch Dee's tutorial video on this topic.


